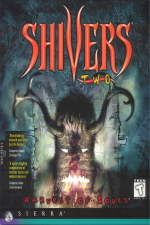
 Shivers 2
Harvest of Souls
Game Details: Horror, 1997
Links: Moby Games
Walkthrough Updated: 7/26/2026
Suggested Listening: Where There's Smoke (Ash 25)
Cyclone Motel
Talk to Charles. Open the note and click on it again. Pay him the money and take the change from the counter. You will automatically go to your room (Room 5).
Turn on the radio on the small table next to your bed. Listen to all 4 of the presets. Next examine the telephone. Lift the receiver and press the green button, followed by 1. In the messages you will hear a phone number 555-6331, and the code 1-9-18-8-3. Press 9 to save the messages. Press the green button, then dial 555-6331, but the number has been disconnected. Hang up the receiver and back out.
Turn around and examine the picture of the griffin on the wall. Use your key to open the trunk and examine everything inside. Make sure you pick up the video tape. Look at the video tape in your inventory. Move over to the TV. Examine the VCR, then insert your video tape. During the video you will see several number sequences. You know the names of the band members from the newspaper article in your trunk, and can match them up to the number sequences:
- Dave: 8-5-26-9
- Lyle: 16-3-16-9
- Mike: 17-13-15-9
- Olivia: 19-16-13-26-13-5
- Wendy: 1-9-18-8-3
Based on this you can work out that the number are the positions of the letters in the alphabet plus 4 (wrapping around to 1 after 26). Exit your room and you will find yourself outside. Go over to the door with the red office sign and head inside.
Look at the missing person poster on the wall. Go over to the small silver pot and read the plaque on the wall behind it. Examine the vending machine, but you cannot afford anything. Head around behind the reception counter. Read the note from Pearl in box number 6, then use the phone on the desk to dial the number 555-6321. Examine the small answering machine to the right of the phone. Press the left button, but there are no new messages. Press the right button to hear a saved message, then the red button to re-save it. Repeat this twice more to hear all of the saved messages. Read the letter on the left side of the counter. Look down and search through the drawers to find a bible - read this including the highlighted passage and the note hidden inside. Also take the pottery piece (1/4), and notice the razor blade (you cannot pick it up).
Go over to the TV in the corner of the room and use the bottom-left knob to watch a video - you will automatically head outside and see a vision. Go straight back into the office again. Take the pink gum from the counter. Go back over to the TV and use the gum on the red light at the top-left corner. Now use the bottom-left knob and watch a video; once it is done, watch another one. Keep watching them all to get hints for the rest of the game:
- Alone Inside: Hint for the tomb in the cemetery
- Candy Cane Dragon: Hint about the barber pole
- Get a Grip: Hint about the window at the grocery store
- Ianyi: Hint about the library book
- Move Without Thought: Hint about the bank door
- Spell It Out: Hint for the computer password
- Warm Place To Hide: Hint about the open book icon
- Was I Even There?: Hint about portrait frames
Go back to the counter and press the bell, then take the Bahos (1/12) from the jack-in-the-box. Pay attention to the symbol on the jack-in-the-box, as you will need to find it later. Back out to see a vision, then head outside. Go across the car park and you will see another vision telling you to go to Devil's Mouth Canyon. Look at the map and find your way to the next destination (once you have visited a location, you can return to it by clicking on the map).
Devil's Mouth Canyon
As you enter the canyon you will see a vision that mentions the Kiva. Go forward to a glowing red room. Your life force will gradually deplete in this area, so look out for spiral symbols to touch to restore this if you get low. Continue to another red room, and then a third one. In these red rooms, there are multiple geometric symbols on the wall. Click on the one that matches the jack-in-the-box symbol (looks like a blocky diamond) and you will see a puzzle. You need to rotate and move the pieces into position to completely fill the shape.
Now explore until you find some stairs to climb up into a darker stone area. Go into a room on the left and raise a wooden board on the right, then turn the skull that is revealed. Go through the doorway that opens. Explore this area to find an altar, and place the Bahos into the correct slot (5th from the left). This will restore a portion of your life force.
Use your map to head back to the Cyclone Motel, then go to your next destination.
Gusty's Gas Station
Go inside. Turn left and look at the mummy, then read the plaque beside it. Turn around and look at the drawer on the pedestal. Open the drawer to find a chess board inside it. Also read the note above it on the wall. Go over to the TV and use the gum on the red light at the top-left corner. Now use the bottom-left knob and watch a video; once it is done, watch another one. There is only one new video available at this stage:
- Know Your Enemy: Hints for the gas station and library
Head over towards the desk in the corner of the room. Look at the poster on the wall. Use the answering machine to listen to the new and saved messages. Look in the bottom desk drawer and examine the calendar here. Try to open the top desk drawer but it is stuck.
Go through to the back of the garage. There is a car here and a hydraulic system that you cannot use yet. Return outside and head back to the motel.
Cyclone Motel
Go to Room 6 and head inside - this is Stewart Warensky's room. Examine the wallet in here, looking at the 2 cards as well as the front and back of the photograph. Pick up the blue crowbar from the floor. Look in the rubbish bin and examine the torn photograph. Look in the top drawer and take out the chess piece (1/4).
Leave the motel again and walk into town until you find the cafe.
Cyclone Cafe
Look at each of the pictures on the left wall - you can flip one of them over and search in the backing to find a sketch from Olivia. Back out and look inside one of the menus on the counter to find a floppy disk. Also take the flower from the counter.
Notice the candle on one of the booth tables. At the end of the room, look at the Indian pot and read the plaque above it. Now go through to the kitchen.
Take the piece of paper from the doll on the stove. Take Pearl's house key, which is hanging to the right of the doorway you came through. Continue through to the back room. Read the book on the desk, include the note from Burt inside. Use the answering machine to listen to the new and saved messages. Open the right desk drawer and look at the envelope, then all the photos inside. Open the left desk drawer and read the message. Use the phone on the desk to dial the number 555-6000.
Head all the way back outside, then go to your next destination.
Pearl's House
Go up the stairs and approach the front door then use the key from the cafe on the left side of the door to unlock it. Head inside.
Go through to the kitchen. Open the oven and read the diary inside. Next find the bedroom. Open the bottom drawer and look at the picture and the letter. On top of the drawers, open the toucan's mouth and take out another chess piece (2/4).
Make your way to the basement and open the blue suitcase, taking out the cassette recorder. Click on the large green bat in the corner of the room and solve the puzzle - you need to eat bugs along the paths, finishing with the green bug at the far right:
Take the Bahos (2/12).
Devil's Mouth Canyon
Go to the third red room. Click on the symbol that looks like a bat and solve the puzzle. Now proceed up to the darker area, raise the board and turn the skull. Find the altar and place the Bahos into the correct slot (3rd from the left). Use the map to exit.
Barber Shop
Click on the base of the rotating barber pole, then open it and examine a folded note inside. Back out and examine the puzzle on the left. You need to move the tiles around using the 4 screws, to recreate the symbol shown in the corners of the puzzle - once you are done the doors will open, and you can head inside.
Look at the picture on the left wall. Use the answering machine to listen to the new and saved messages. Read the plaque over the bowl, the framed newspaper article, and the invoice on the bench. Examine the button and the silver coin on the floor behind the screen partition. Also examine the barber's tools (the razor is missing).
Go over and click on the barber's chair. Next head to the sink. Turn the left tap and wait until a spider falls into the sink, then click on it to see another puzzle. You need to guide the spider to the destination at the top of the maze. Follow this steps (up is to the top-right in this description):
- Up over the blue bridge
- Right, up, right and up over the red bridge
- Up, right, up and right to the red button
- Down over the yellow bridge
- Left and up over the blue bridge
- Left and down over the red bridge
- Left and up over the yellow bridge
- Right and down over the blue bridge
- Right, down and right to the blue button
- Up over the red bridge
- Up over the yellow bridge
- Up to the red button
- Left over the blue bridge
- Left over the red bridge
- Left to the yellow button
- Down, right, up, right and up over the blue bridge
Take the Bahos (3/12).
Devil's Mouth Canyon
Go to the second red room. Click on the symbol that looks like a spider and solve the puzzle. Now proceed up to the darker area, raise the board and turn the skull. Find the altar and place the Bahos into the correct slot (5th from the right).
Bakery
Examine the puzzle on the left of the door. You need to move the tiles around using the 4 screws, to recreate the symbol shown in the corners of the puzzle - once you are done the door will open, and you can head inside.
Look at the picture on the left wall. Use the answering machine to listen to the new and saved messages. Take the music box to the right of the telephone and Norah will appear to give you a message. Examine the ceramic tablet in the corner of the room and the plaque over it.
Go to the back room and examine the large metal storage container to find it is empty. Turn right and approach the other large machine. Pull the red lever on the right, then open the hatch. Click on the head to get the rules of the puzzle, then make these moves:
- Move a donut from position 4 to 1
- Move a donut from position 6 to 9
- Move a donut from position 8 to 3
- Move a donut from position 2 to 5
- Move a donut from position 10 to 7
Take the Bahos (4/12).
Devil's Mouth Canyon
Go to the second red room. Click on the symbol that looks like 2 downward-pointing triangles and solve the puzzle. Now proceed up to the darker area, raise the board and turn the skull. Find the altar and place the Bahos into the correct slot (1st from the left).
Museum/Library
Head inside and up the first set of stairs. Look at the card catalog on the left. Open drawer O-P and take out the chess piece (3/4). Continue up the stairs on the right. Read multiple newspaper articles, then look in the shelves and find a book to read called "Symbols and Masks".
Go back down the top stairs and then down the opposite stairs into a lower part of the library. Go between the shelves and take the lighter book on the right to make the shelves fall; Norah will appear and point out a book on the floor called "The Ianyi Stone" - read through this.
Go back up the lower stairs and approach the door on the left. Insert your pottery piece into the third depression in the door. Back out from the door. Head over to the far right and look through the peephole. Now leave the library.
Sheriff's Department
Go inside and examine the wanted poster on the wall. Search the G-M drawer of the filing cabinet to find an accident report. Examine the missing report files and photo in the tray on the desk. Use the answering machine to listen to the new and saved messages.
Go through the wooden doors into a small room on the left. Look at the skull on the wall and examine its horns to find a key. Go back to the main room and look at the number on the large circular lock of the jail cell. Now use the key you just found to unlock the top right desk drawer. Read the book inside. Turn to the page matching the number on the lock, then open the lock using the combination shown on the bottom of the page.
Enter the cell and take the chess piece (4/4) from the table. Look at the signature on the wall, the magazine on the bed, and the bucket on the floor. Leave the cell and return to the other small room.
Click on the doll seated at the table, then press the green button. This is a memory game based on the positions of 9 cards. Place each of the cards into the grid, then watch as they move around and click on the cards indicated in order. Once you are done, take the Bahos (5/12).
Devil's Mouth Canyon
Go to the first red room. Click on the symbol that looks like a plus sign. Now proceed up to the darker area, raise the board and turn the skull. Find the altar and place the Bahos into the correct slot (6th from the right).
Gusty's Gas Station
Go inside and open the drawer of the pedestal to see the chess board again. You need to place the 4 chess pieces in position based on the writing on the bottom of the pieces themselves:
- Black Bishop: Position A1 (bottom left)
- Black Pawn: Position A2 (just above black bishop)
- White Bishop: Position C1 (two right of black bishop)
- White Knight: Position C2 (just above white bishop)
The lower drawer will open. Take the screwdriver and read the note. Head over to the desk and use the screwdriver on the top drawer to get it open. Take out an empty gasoline can.
Go through to the back of the garage and turn right to look at the hydraulic system. Flip the small lever up (if this doesn't work, go and watch through the videos on the TV again). Turn the red valve right and left until you reach a pressure of 230. Back out and move the lever on the other device to raise the car. Move over to the car and look up to find a book. Read through this and take the church key from inside the back cover. Return outside and fill the gas can using the pump.
Community Church
Head inside and examine the donation box on the left. Use the church key to open it and read the note, which has a code at the bottom. You cannot take the quarter that is stuck to the note.
Back out and enter the back room, looking at the shoes on the floor. Use the answering machine to listen to the new and saved messages. Search the desk drawers to find a blue receipt book, some dynamite, and another pottery piece (2/4). Look at the family poster on the wall, then approach the bingo ball puzzle, where you need to arrange the balls in order from 1-8. Click on the balls in this sequence: 6, 3, 8, 6, 5, 7, 3, 5, 7, 2, 1, 4, 6, 7. Once you are done, take the Bahos (6/12).
Devil's Mouth Canyon
Go to the second red room. Click on the symbol that looks like a staircase. Now proceed up to the darker area, raise the board and turn the skull. Find the altar and place the Bahos into the correct slot (2nd from the right).
Phil's Market
Examine the missing people posters on the wall. Go over to the desk, then turn around and pick up the quarter from the floor near the vending machine. Use the answering machine to listen to the new and saved messages. Look at the rattlesnake in the glass case and click on it several times. Look at the stone tablet along the wall and read the plaque to its right.
Head over towards the green shelves, then turn right to look at the window. Lift up the loose tile (3rd from the left) and take the token. Use this token on the vending machine and select "Desert Soda", then take the cryptex. On the other side of the store, examine the coat in the closet to see a button is missing.
Open the refrigerator and examine the puzzle inside. This is the starting position:
The dots indicate how many steps you can move from each position. Click on the egg dispenser at the top left - the goal is to get it to the bottom right. Click on these positions in order: A4, B4, G4, G6, A6, C6, F6, F3, F1, C1, C4, C7, E7, E3, B3, G3, G1. Once you are done, take the Bahos (7/12).
Devil's Mouth Canyon
Go to the first red room. Click on the symbol that looks like a horned skull. Now proceed up to the darker area, raise the board and turn the skull. Find the altar and place the Bahos into the correct slot (6th from the left).
Cyclone Motel
Enter the office and approach the vending machine. Combine your single quarter with your other quarters. Press C2 on the vending machine, then insert the coins at the top right. Pick up the batteries after they fall down.
Phil's Market
Return inside and look at the glass case on the desk - the rattlesnake will be gone. Look at the code inside the cage (12x89#417). Take out another pottery piece (3/4).
Museum/Library
Go inside and up the first set of stairs. Approach the back door and insert another 2 pottery pieces above the lock to make some room in your inventory.
Cemetery
Go through the iron gates into the cemetery in the middle of town. Read the inscriptions on the tombstones. Approach the angel statue and place the flower in the holder. Touch the angel's 10 toes in order from left to right, and a compartment will open. Examine the CD cover (and remember what it shows) - also take the small rod from inside the case.
Follow the path around the cemetery and climb up the ladder into mausoleum. Read the headstone here to see Norah died on August 22, 1992. Examine the tile puzzle beneath the headstone - you need to recreate the image from Olivia's sketch in the Cyclone Cafe. Once you are done, go back down the ladder and through the open door to the left of it. Read the message in here.
Warehouse
Approach the door and insert the small rod you found at the cemetery. Now adjust the door so it matches the CD cover you just saw. Once the door opens, head inside. Turn right and head to the lower stage. Approach the drum kit and examine the hi-hat cymbals - open them and take out a cassette tape.
Head back up the steps and right into the recording room. Look at the bag beneath the table and read Olivia's notebook inside it. Go over to the pair of crates and click on the left one to open it, then look at the marble puzzle inside. You need to rearrange the marbles so they are on backgrounds of the same color, and you only have 38 moves in order to do it (moves onto the star spaces don't count). This is the grid layout:
Make the following series of moves:
- F1 to C1
- A2 to A5
- B7 to E7
- G2 to G1
- G1 to F1
- G6 to G2
F3 to G3 (free move) - G3 to G6
B5 to B4 (free move) - B4 to A4
- A4 to A2
- E4 to E3
E3 to G3 (free move)
B6 to B4 (free move)
C6 to C5 (free move) - E6 to B6
- B6 to B7
- E2 to E6
- E6 to B6
- D5 to D6
- C2 to E2
- F2 to F4
- F4 to E4
- F5 to F3
- C5 to F5
- C4 to C6
- B4 to C4
- B3 to B5
D3 to D2 (free move) - F3 to A3
- F5 to F2
- F6 to F3
- F3 to D3
- D6 to F6
- E7 to E6
- B5 to F5
- B2 to B5
- B5 to D5
- D2 to B2
- C1 to C2
- A3 to B3
- A5 to B5
- G3 to F3
The right crate will now open. Take the Bahos (8/12).
Devil's Mouth Canyon
Go to the third red room. Click on the symbol that looks like a rain cloud. Now proceed up to the darker area, raise the board and turn the skull. Find the altar and place the Bahos into the correct slot (4th from the right).
As you leave the canyon, Norah will ask you to identify your enemy from the following list (the symbols can be seen throughout the game and you must link them to names of characters):
- Bear Claw: Tad Matthews
- Book: Max Wharton
- Cross: George Bellairs
- Eye: Burt Thompson
- Snake: Phil Dunlop
- Star: Andrew Washington
- Arrow Head: Charles Spencer
The correct selection is the Book (Max Wharton).
Mine Entrance
In your inventory, put the cassette tape into the cassette recorder, then also insert the batteries. Play the tape to hear a chant. Enter the mine and follow the tracks until you reach an elevator. Pour gasoline from your can into the engine on the left, then lift up the switch.
Open the elevator and get inside, then turn around and press the down button. Turn left and go down the stairs, then continue forward until Norah warns you to stay away. Turn right and explore until you find a torch. Make your way back to the elevator and pick up the Bahos (9/12).
Devil's Mouth Canyon
Go to the first red room. Click on the symbol that looks like an hourglass. Now proceed up to the darker area, raise the board and turn the skull. Find the altar and place the Bahos into the correct slot (4th from the left).
Burt's Trailer
Approach the trailer and look at the sheeting to the right of the steps. Pry this back with the crowbar, then look inside the cooler box here and take out the vault key (1/2). Back out, then enter the trailer.
Go to the kitchen and read the note on the bench next to the paper bag. Look in the top left cupboard, then inside the recipe box to get a code grid. Look in the top right cupboard, and take the fake Ianyi stone half from the top shelf. Continue through to the back room. Examine the large portrait and take the matches from behind it. Norah will talk to you when you back out from the portrait. Read the letter beneath the coffee tin just to the right of the portrait.
Return to the front room and look at the picture on the dart board. Turn around and open the wardrobe, but there are bees inside it. Use your matches on your torch, then open the wardrobe again - you will smoke the bees away. Open the box to reveal a rolling cube puzzle. You need to roll the cubes so you can see the pictures on all of them, and the middle space must be empty. Number the spaces as follows:
From the starting position, roll the cubes in these positions: 4, 1, 2, 3, 6, 5, 4, 7, 8, 9, 6, 5. Take the Bahos (10/12).
Devil's Mouth Canyon
Go to the first red room. Click on the symbol that looks like a diamond. Now proceed up to the darker area, raise the board and turn the skull. Find the altar and place the Bahos into the correct slot (1st from the right).
Cyclone Cafe
Use your matches on the candle in the booth, then hold your blank piece of paper over the flame to review a number. Go to the back room and use the telephone to dial the number 555-9547 - you will receive a clue that the next Bahos is under the griffin.
Cyclone Motel
Go to room 5 and head inside. Look in the bottom drawer beneath the picture of the griffin on the wall, and grab the next Bahos (11/12).
Devil's Mouth Canyon
Go to the second red room. Click on the symbol that vaguely looks like a star. Now proceed up to the darker area, raise the board and turn the skull. Find the altar and place the Bahos into the correct slot (3rd from the right).
Savings and Loan
Approach the door, which has a number puzzle. You need to press the numbers so the consecutive groups of 3 numbers add up to 11, 12 and 13. This is one solution:
- Press 1, 2 and 8
- Press 0, 5 and 7
- Press 3, 4 and 6
Once the door opens, head inside. Go over to the right to see a puzzle on the wall that comprises 6 triangular pieces, within a grid of 6 squares. Inside each square, the triangles can occupy a top of bottom position. Label the positions as follows:
From the starting position, make the following moves:
- Move from E1 to D2
- Move from E2 to F2
- Move from D2 to F1
- Move from C2 to E2
- Move from C1 to E1
- Move from A1 to B1
- Move from A2 to B2
- Move from E1 to A2
- Move from E2 to D2
- Move from A2 to D1
Pick up the large hammer. Go around to the back of the reception desk and use the hammer to smash the purple pottery piece. Take the final Bahos (12/12).
Devil's Mouth Canyon
Go to the third red room. Click on the symbol that looks like a crown. Now proceed up to the darker area, raise the board and turn the skull. Find the altar and place the Bahos into the correct slot (2nd from the left). You will step back from the altar and hear words from the hole in the middle of the floor. Use the tape recorder here to get your final instructions.
Savings and Loan
Head inside. Go around behind the reception desk again and look behind the picture on the wall to find a safe. The safe has 6 orange panels, that correspond with the 6 portraits around the bank. Go and examine these portraits and count the animals (1 tiger, 5 hyenas, 4 elephants, 3 antelopes, 5 zebras, 0 animals with a tree). Go back to the safe and open it with the code 154350. Inside the safe, take the final pottery piece (4/4).
Museum/Library
Go inside and up the first set of stairs again. Approach the back door and insert the final pottery piece above the lock. Based on the drawing in the church donation box, press in the 4 bottom buttons, as well as the one at the top left. Go through the open door. Pick up the vault key (2/2) from the floor.
Savings and Loan
Approach the large vault door and take note of the code it displays (a number and a direction). Open the small wall safe behind the desk and look in the black book. Use your code grid on the book. Turn to the page indicated by the number on the vault. Rotate the code grid so the black ears of the zebra on the edge point in the direction indicated on the vault. You should now see a code demonstrated (it will be 6 letters/numbers, and you should read from the top down).
Go to the large vault door and enter the code indicated. For example if the code is 6R9L5R, turn the dial right to reach 6, then left to reach 9, then right to reach 5. The door will open when you are correct. If you want to try a different combination, exit the bank and come back inside.
Turn towards locked 32B. Use your of your vault keys to open it. Take out the video cassette and the jar of sand. Go back out to the bank reception desk and use your floppy disk on the computer. Enter the username LYLE and password AIVILO, based on the Spell it Out video. Read through the message, paying attention to the code provided: KOJDSQTAWULLPOBSCLKMMCTE. Use the cryptex you found at Phil's Market, and enter this code in 3 segments:
Next look in the trash can to see a torn note. Put the pieces of this back together.
Cyclone Motel
Go to room 5 and head inside. Watch the video cassette by using it on the VCR over the TV.
Max's Cave
Examine the small bright stone on the ground and take the key from inside it. Use this key on the gate to unlock it, then go through. On the door ahead there are 8 bars with different numbers. You can also flip the bars over to show different numbers. You need to make them display Norah's date of death in reverse (2991228).
Continue through the door once it opens. Continue forward and over to the office area on the left. Place the music box just to the right of the computer, then use the computer to automatically send a message. As you leave the cave you will get another vision from Norah.
Cemetery
Pick up the gold key from the floor of the low room of the mausoleum inside the cemetery.
Max's Cave
Find the golden door inside the cave. Proceed down the stairs and look at the book and pictures on the desk, then take the real Ianyi stone half.
Devil's Mouth Canyon
Go all the way through to the skull to see it has been destroyed. Norah will appear and tell you there is another way, and give you a code: "star, spider, breath, raincloud".
Mine Entrance
Go down using the elevator, then continue through the tunnels and up the ladder. Look at the panel of buttons (which correspond with the Bahos symbols). Press the 4 buttons that correspond with the code Norah just gave you, in the following order:
After the ride, make your way forward until you reach the hole in the floor at the Kiva. Use the tape recorder over the hole again, then save your game.
Look at the round carving in the floor and use the sand here, then look up again. There are now multiple ways to end the game:
- Give the real Ianyi stone half to Norah
- Give the real Ianyi stone half to Max
- Place the fake Ianyi stone half on the altar. When Max bends down, quickly take the fake Ianyi stone half and use the real Ianyi stone half in its place. Wait until time runs out on the mirror puzzle.
- Place the fake Ianyi stone half on the altar. When Max bends down, quickly take the fake Ianyi stone half and use the real Ianyi stone half in its place. Solve the mirror puzzle by guiding the light through all 4 crystals, then click on the hole in the floor.